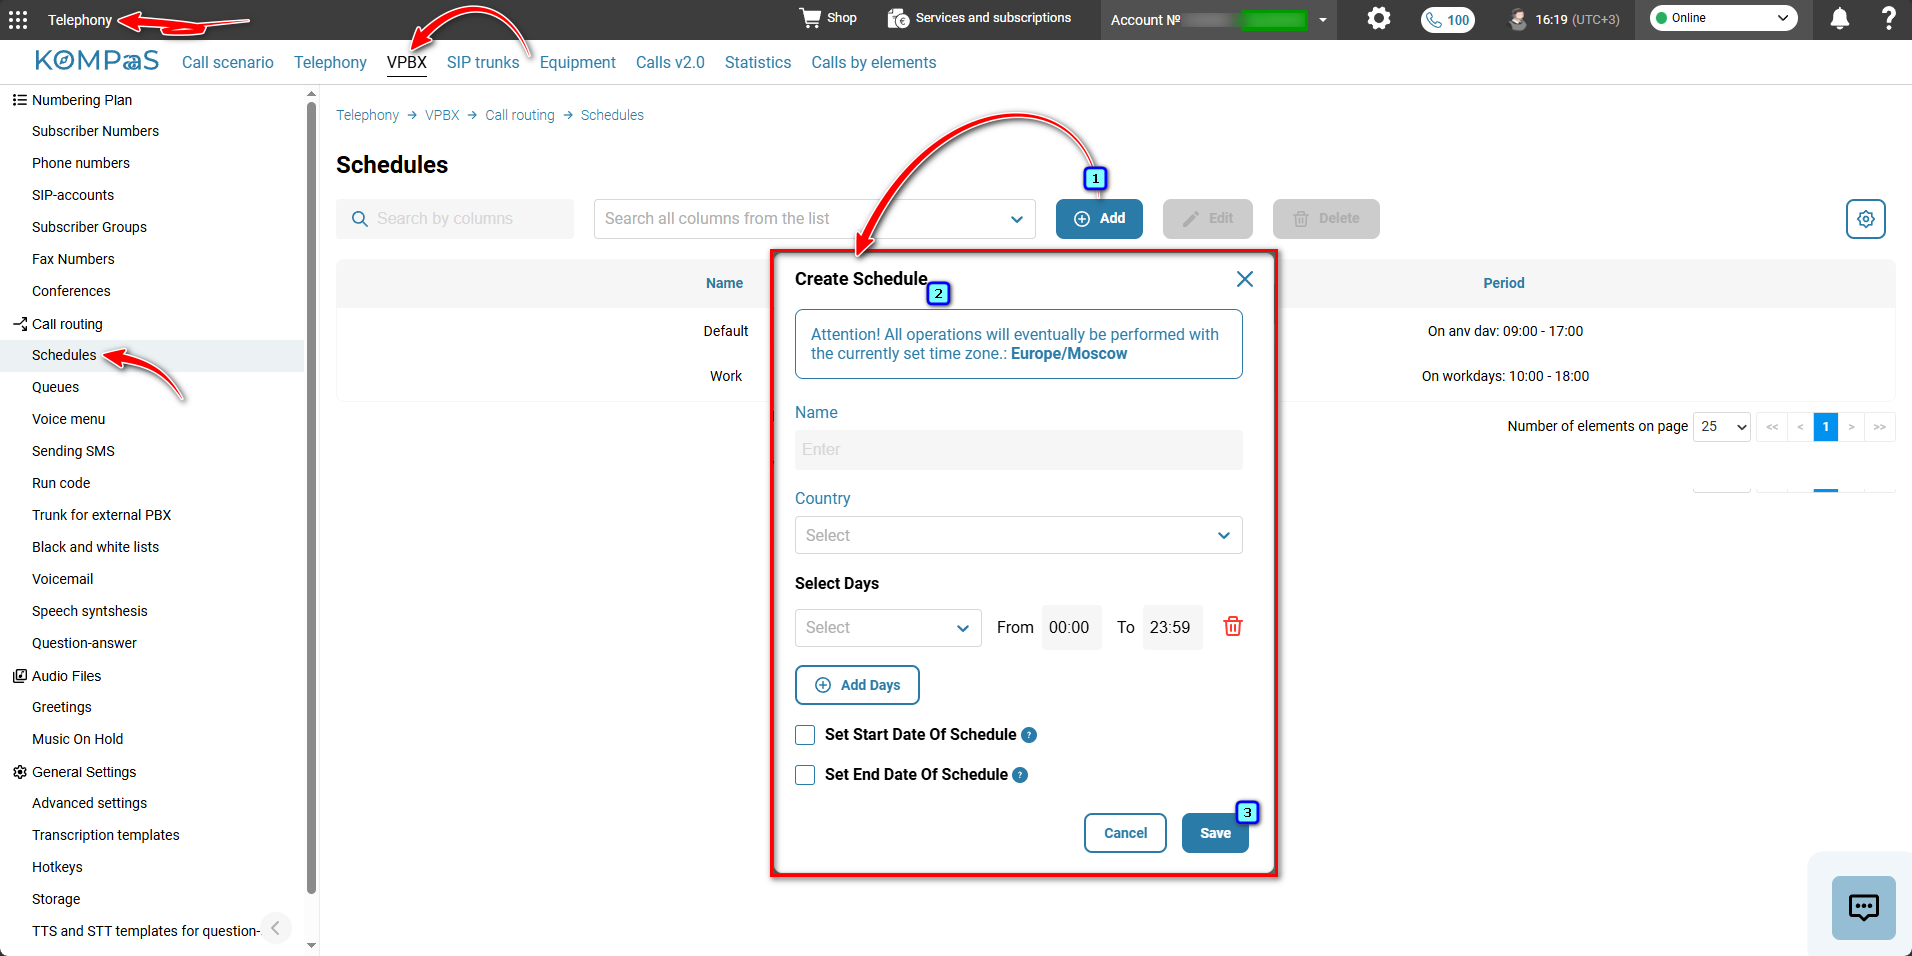
To configure the call schedule, go to 'Telephony' tab 'VPBX' → in the left-hand menu 'Call routing' → 'Schedules'.
Click 'Add'.
In the 'Create Schedule' window, specify:
In the 'Name' field, enter the scenario name;
Use the 'Add Days' button to select the days of the week for which you want to configure the schedule, and specify the start and end times of the period during which you want calls to be handled in a specific way;
If you need to set a schedule start date, select the checkbox next to 'Set Start Date Of Schedule';
✅Note:
If the schedule start date is not specified, the schedule will take effect from the moment it is created.
If you need to set a schedule end date, select the checkbox next to 'Set End Date Of Schedule'. The schedule will remain active through the end of the specified date, i.e. until 23:59;
✅Note:
If the end date is not specified, the schedule remains active until it is deleted.
Save the schedule settings by clicking 'Save'.
After the schedule is added, it can be edited. 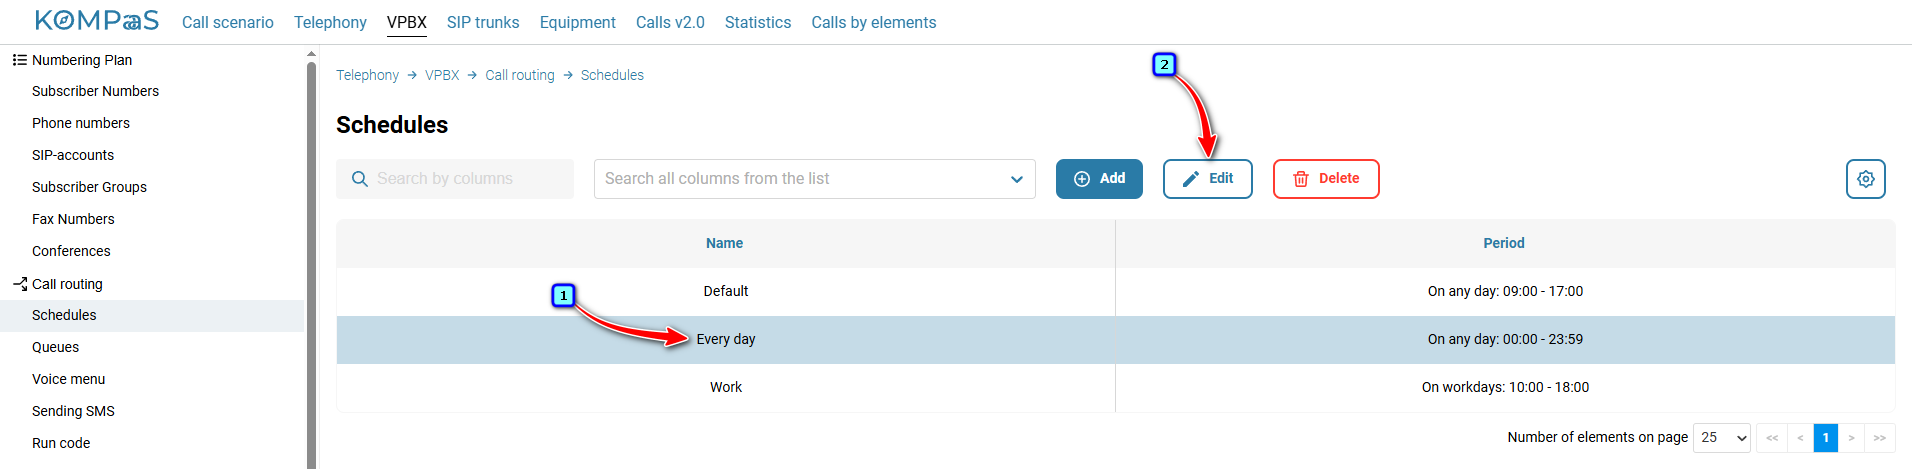
Also see:
Was this article helpful?
That’s Great!
Thank you for your feedback
Sorry! We couldn't be helpful
Thank you for your feedback
Feedback sent
We appreciate your effort and will try to fix the article